Archive for » September, 2010 «

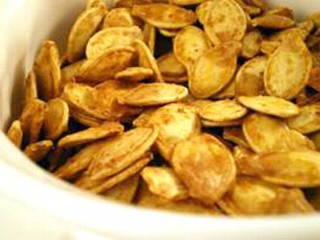
Best Pumpkin Seed Recipe

Ok it took much trial and error to fineally hear from someone to try boiling the seeds first, DUH why did I never think of that before? 

So with the addition of boiling my pumkin seeds are now so much more yummy.  I like to experiment with flavors. Try pumpkin pie spice or just plain sugar and cinnamon for a yummy sweet treat, even try boiling with some lime juice and when baking add chili powder for a spicy seed!  The possibilities are endless. 

Below is my tried and true method for Best Pumpkin Seeds EVER!  Enjoy!!

Pumpkin carved with seeds removed and washed (use colonder watch out these seeds are slippery little stinkers)

1 TBl. Salt

1 TBl Olive Oil

2 c Water (add lime juice  if using chili spice)

1 tsp to 1TBl. Spices to your liking

Preheat oven to 400 degrees

in small sauce pan add 2 C water for every 1/2 cup seeds add 1 Tbl salt  (more salt if you like it seeds saltier) and boil

Simmer seeds for 10 minutes

drain

Toss 1 TBL Olive oil  and seeds put in roasting pan, in a pinch I have used Pam spray

sprinkle with spice if desired (no need to add any extra salt)

Spread out seeds and bake on top rack

10- 20 minutes

let cool and eat

Momma Says: Turn Jack’s slimy guts into salty, crunchy ooohh so yummy snack.

Game Review: Learn Geography- Nintendo DS

Well my 7 yr old daughter got some “learning games” for her Nintendo DS. Since she spends so much time playing regular games thought it would be nice to have her doing some that will educate her in the process. Online was ordered a bunch of learning games. One of which was Learn Geography supposedly for second grade and up.  Thought I would give my second grader a try on it.

 Well it does have a few nice games on it but, I was really hoping it to be slightly more “kid friendly”Graphics are boring considering what kids play nowadays. It has a kinda lame pencil to host game and he shows you through it. Only if you can read what he is saying. Another problem is if your in second grade you are a beginner in reading and it expects you too. I think it will be a little hard and frustrating for any beginner. Too bad it did not have even an option to make games either easier or harder. There is absolutely no voice prompts, so on sections like “new Word order” where it shows a picture with scrambled letters kinda scrabble-like underneath, If you don’tknow what your looking at  it is a put off. Problem the average 7 or 8 yr old second grader does not know what the Taj Mahal looks like so if  it shows a picture and expects you to spell it without a voice prompt how are they susposta know what the picture is?  It is timed so the stress of “Momma, what is this picture” made her not want to continue. There are other games like city search, where you touch a map where you are guessing the city is that is says. Like I said no voice prompt so kinds hard for them.  After about two tries she gave up.  I would say this is more for fourth grader and up maybe a smart third grader.  We will try it again next year. Til then its in the drawer.  On the other hand I enjoyed the brush up on cities and as such been a long time for me sitting in class, I could find it somewhat fun. Definitely not for young learners. Older kids would find it more interesting but I think the boring graphics would make a older kid or teen think it is not cool.

Momma Says: Try to keep awake in school durring Geography is hard, this is no different…

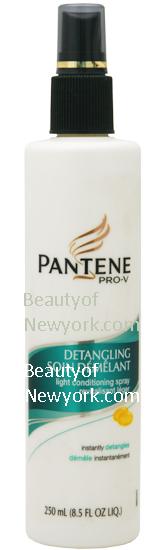
Product review:Pantine Pro-V Detangling light conditioning spray

First off I would like to say I usually dont like to use non professional hair products.  But sometimes money is tight, I get it. The good stuff can cost you an arm and a leg. So I got a bottle of the Pantene Pro-v detangling light conditioning spray. this is a leave in spray conditoner actually does what it says! Instantly detangles for real!  I have used many“kid friendly” brands who bottled are sold with kids in mind from packaging to smells of green apples and none worked as good as the Pantene Pro-V spray! 

My daughter is very tender headed and morning hair brushing is a  chore for the both of us. I have in the past tried brushing before bed putting it in braids, pony tails, even night caps and then once resorted to cutting her hair short to avoid the “rats nest” that she somehow develops in the middle of the night while doing her slumber calastetics. She is just one of those people that her hair just tangles. So it makes for a fun morning getting ready for school.  Like I stated before I have tried many different brands for our morning torture session. Some work fairly well where others like Breck brand is a total waste of money. Pantene’s Pro-V Detangling light conditioning spray conditioner is by far the most superior.

Though the tears started the moment I had brush in hand I will say that the Pantene spray was used liberally and if you start at the bottom on the hair instead of ripping out your poor child’s hair by the root and brush up the hair from ends to scalp, you will see a great improvement in how quickly it works and how much more happier your little one will be. The avoided screams are always a plus. So I highly recommend this product as one of Momma Says official MUST HAVES!

Momma says: Spend less time battling the brush for a more time tear free morning with Pantene Pro-V detangling spray.

Movie Review: Legend of the Guardians; The Owls of Ga’Hoole

This is a definitely good movie the CG is so realistic. Very much more visual than your typical animated movie. My daughter made the comment  “It looks so real Momma, I want to pet one” .  The flight scenes when the lead character Soren is trusting his gizzard is beautiful to watch.  ” I wish I could fly with them Momma’ my little one would wisper to me.

The movie is about  Soren, Kludd, and Eglantine three owlet. Who live in a big tree with their parents and nanny snake Mrs P.  Soren and his sister Eglantine like to hear stories told down through generations by their father of “The Guardians”.  The protector owls and their battles against evil.  His brother Kludd does not at all. Then the brothers are kidnapped and taken to a place called St. Aegolius Academy for Orphaned Owls. Where the evil Metal Beak is really training them to build an army and intend to take over all of the owl kingdoms. Owlets who resist are  moonblinked, think of it like brainwashing or being zombie like. Then Soren escapes without his brothers help and is sent out on an adventure to find “The Guardians” to save the owls from Metal Beak and the Pure Ones. The screenwriter John Orloff is quoted as saying he wanted to make a “Lord of the Rings” for kids.

Even though the battle is what the movie leads up to between the Guardians with Metal Beak and the Pure Ones. They are a bit violent for little ones. Battle scenes are even more intense with the slow motion of  metal clad talons. The movie has some dark tones to it that some kids might not be ready for. Like the “pure ones’ master race theme. Even when Soren’s brother Kludd turns against him, then putting their little sister Eglantine in harms way.   This is a PG rated film, so keep that in mind .  It does show the owls getting kidnapped and taken away. This made my little one who is 8 a bit uncomfortable at first. She also got a little shock in the beginning when an owl swooped on a mouse and carried it off. She gasped at that one, I had to tell her that is how nature is and not to worry. So if your little one is thinking this is just a funny owl talking film this is not. It has a good type of storyline, which I enjoyed the twist and all but the kids under 8 might not understand.

My daughter actually was kicking her feet out like the owls in battle and she did not take her eyes off the screen.  You definatly are rooting on Soren. He is a good hearted hero owl, who leads the other owls in search of the Guardians and finds out that battles are not glamerous like stories, owls get hurt, scarred even killed in battle. As shown by Soren’s hero who has battle scars to his face. It has a nice positive moral that is told by their father who tells them that just because you cannot see something, that does not mean it isn’t real, is a good message.

YouTube Preview Image

Momma Say: “Let instinct guide you” great message for a great film!

Movie Review: Tinker Bell and The Great Fairy Rescue

What would you do if you met a fairy? Witness the historic moment when Tinker Bell first meets a human being, and it’s not who you think.

New to DVD by Disney is Tinker Bell and The Great Fairy Rescue.  As expected the animation is extremely well done.  In this sweet and lighthearted movie Tink and her friends from Pixi Hollow are at Fairy Camp  where all the fairies are busy painting stripes on bumble bee, designing butterfly wings, spinning Queen Ann’s lace and teaching crickets to sing. They are all fixing things up for Summer and getting ready when Tinker Bell sees something she has never seen before and decides to follow it and winds up by the home of humans, Lizzie and her scientist  father.  Her curiosity gets to her as she is amazed by a “horseless carriage” and she tinkers around with the engine parts at that time she sees the little girl named Lizzie, who believes in fairies even though her father tells her there is no such thing. Then Tink gets herself caught accidentally in a little house the girl made. A special bond is made with the lonely little girl and the adventure for them both starts. When the other fairies think Tink has been captured they ban together to save her.

Faith, trust and Pixi dust is the motto the fairies go by when things get rough. The antics are so cute on how the clever little fairies do things. My daughter would bust out in giggles throughout the movie. there wasn’t a moment when she did not sit there in full attention. “I wish I could fly, Momma, wouldn’t that be awesome?”

There is a touching ending with the girl and her father that makes for a heartwarming  film. This film is a definite addition to the Disney collection in my home. It will be a favorite for any Disney fan.

YouTube Preview Image

Momma says; How cool would it be if you had a fairy for a friend?

Better kid Lunch=Bento Box Lunch (sticky rice recipe)

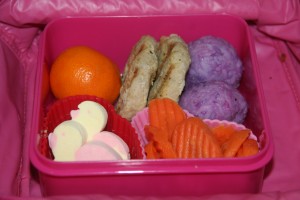
With the recent addition of a very cute Hello Kitty Bento box set my daughter got from her Auntie Isa and Uncle Matt.  I ventured into making the new way of packing a lunch with a healthy and colorful attitude.  If you never heard of Bento boxes they are a Japanese way of a packed lunch box which is small, nutritiously balanced and appealing to the eye.  Think 3 part carbs (usually rice), 1 part protein and 2 parts fruit and vegetables. Traditionally no sweets, but I usually stick some sort of treat if I can fit it. You want to make it nice and compact. I use silicone cup cake liners to help separate foods and add some color, you can also use slices of fruit or vegetables.

I am waiting to get more stuff for my stash to make it even more cute with the addition of nori cutters to make faces out of nori or sea weed. Thinking your kids wont eat sea weed, duh don’t tell them! Just make the cute faces or shapes and they are sure to eat it up!  I have read online of using scrapbooking cutters to cut nori. I tried it and it worked! I just had to adapt to make faces.  Not as cute as the real face cutters but it will do for now. She ate healthy and it made her smile- Mission Complete!

One of the favorites for my daughter is making hot dog octopus. You just take a hot dog and cut it half way up, then cut the bottom half into more slices to make tentacles. Make eyes with nori or something edible like apple skin or a vegetable. Spread out legs onto blue tinted rice.  Too cute with some cheese cutout star fish!

I started with making the onigiri rice balls. These are sticky rice smashed up tight into a ball shape.  There are many recipes out there for sticky rice that make it seem very intimidating. Let me tell you the truth, totally not that complicated! I used my vegetable steamer and it was a breeze!  The rice balls can be made into cute animal faces with a little decorating and imagination that your little one will love to chow down, plus be the envy of all the little classmates.

My daughters friends like to see when she brings a bento to see what kind of lunch is inside. It is all about color and interesting things to make them eat, you will be surprised to see how you can get them to eat veggies or meats cut up into shapes!

First off lets talk rice… The rice must be short grain. NOT Basmati rice.. This is most important!  It just will not stick into shapes if you do not get the short grain.  You will also need some rice vinegar.  This will add a nice slightly sweet/sour taste to the rice ball.

Recipe for sticky rice in a electric vegetable steamer:

Sushi rice (short grain rice)
Seasoned Rice Vinegar (I like Mitsukan-no MSG!)
food coloring (or colored broth from red cabbage)

Before you start you must rinse the rice!  so put 1 1/2 C rice into a bowl and add cold water, swish with your hand. You will see the rice clouds up the water. Pour out water and repeat 2-3 more times. Until water is clear in bowl. Let this now sit for at least 4 hours.  This step is very important if you want nice soft texture to the rice. Preferred method is to let sit for 24 hours. 

I like to color the rice to make it even more kid friendly. You can use many vegetables cooked down like red cabbage to get pink to purple color. I just use a high quality food coloring.  I place enough color to make the water that the rice sits in strong enough to color the rice, more or less to  make the shade you desire.  Shade will also depend on how long you let rice sit in colored water.

After you let the rice sit up to 24 hours I then put the rice into the steamer bowl (with a slotted spoon to only put in the rice, reserve colored water) that came with my electric steamer. I add the water to the higher level indicated on the steamer bottom. place attachments needed put bowl inside steamer. I then only added enough of the colored water to just cover the rice in the steamer bowl attachment. Put the lid on and set timer for 45 minutes.  Half way I mixed up the rice and checked for tenderness and stickiness. You will know it is done when rice is somewhat translucent, but taste it. That is truly the way to test texture. My steamer takes the whole 45 minutes. 

 After it is done I dump the rice into a bigger bowl and add a couple tablespoons of the rice vinigar to taste, folding it into rice. 
The easy way to make a rice ball is to get a little plastic sandwich size baggie and put some rice into it and squish it into the corner of the bag, form into a ball or whatever shape you like. I even used it at this point to push into a large flower cookie cutter (baggie and all) it made a nice shape and did not stick to cutter.  I have even made a half ball shape, put some spam in the middle then added more rice to make a stuffed onigiri sticky rice ball. That one was a huge hit! You could probibly fill it with whatever leftover meat you had the night before.

Obviously this will make quite a few balls. So make sure unused rice balls are stored with a damp paper towel in a ziplock baggie with air removed. I only store up to 5 days as rice looses its nice texture if too old.

So try to make a bento box. You dont need a fancy box.  I was using a ziplock brand storage container, it was nice and had compartments even! You will be rest assured your little one is eating healthy and have fun doing it also.  I have even heard some women eat bento style and have lost weight in the process! I will definitely try that one out for me just minus the hot dog octopus!

Momma says; Go Bento – Go healthy – Go FUN!

Recipe: Yummy Diabetic Apple Pie

It is that time of year when fall makes you think of home-cooked treats especially with the holidays around the corner.  I can not believe it already!  So since we all went to the Happy Apple Farm and the kids and I picked a couple bags of natures finest snack, it is time to make the pies, apple butters and fritters!  I make my father who is diabetic a few different versions of apple pies.  Even though I prefer the Dutch Apple style of pie, he is tried and true with the standard double crust version. Since he paid for the Apple Farm fun and drove us there it is the least I can do to say “thanks PT”. Long story on how he got that name, but that is for another time. 

I have this dandy apple peeler where you put the apples on it and crank away. This comes in handy for assembly line type of action that you can get your kids into!  Hecka beats the old fashioned potato peeler, especially if you plan of a lot of apples. From there if you use an apple corer and slicer combo you have it made. Since last year I broke my apple corer and slicer after many years of abuse I had to do the knife and cut up and core the old fashioned way. No Biggie there, just not as quick.   I put all the apples into a bowl with lemon juice until ready for me to use. 

Recipe for Diabetic Apple Pie:

8-10 mix of sweet and tart apples
flour
lemon juice
apple juice (sugar free-organic)
Splenda BROWN sugar
Pumpkin Pie spice
salt
chopped nuts
butter (cold)
egg white + 1 tsp. water
double pie crust

After all the apples are ready, I would say aprox  8 -10 apples sliced 1/4 inch thick. I add (1 1/2) heaping TBL flour, 1 TBL lemon juice, 2 tsp pumpkin pie spice (or use ), little pinch of  salt, 2 TBL apple juice (no sugar – organic) and 1/4 C Splenda Brown sugar.  Mix it all together. This year I wanted to add about 1/4 C of chopped up nuts to add some texture. Put that all in a pie shell, dot with butter. add top crust with cute cutouts.  Last do a egg white plus 1 tsp water mix to brush on top to make it pretty.

Bake that little bit of Americana at 45o for 30 minutes then turn down oven to 350 to continue baking for another 25-35 minutes. Tent with foil if needed to prevent over browning. Cool completely to let juices set up.

My Dad said this was the best pie he ever ate. He liked the addition of the chopped up nuts alot and has already put in the order for pie #2..

Momma says:  An apple a day keeps-forget that- apple pie slice today keeps the ho hums away!

Review: Wizard 101 online game is Wonderful

During the summer my daughter saw a commercial for an online game called Wizard 101.  I had previously let her try Toon Town. Toon Town is definitely much more ”kiddie” with the Disney character theme. Both are very safe sites to play online cause you can set parental control to allow chat or not.  Since the Toon Town account she has been playing for so long now and after 2yrs approximately she has become a little bored.  Plus I think it was actually a little harder for kids if they cant read well cause you had to read where you needed to go and do jobs, alot of the time I had to sit with her and tell her what things said. I thought I would check out this Wizard 101 game and see how safe it was also. I gave her a free account to start and I gave myself one also so we can play together and I can get a feel for the game that she wanted a subscription to.  I of course gave her parental controls. First off I love the fact that it has a arrow pointing you in the direction of the jobs you need and any place your character needs to go and gives the number of steps inside the arrow. Big time bonus for early readers! Me to since I would often get lost at first and the maps are great too. VERY user friendly!  For her Parental controls are good because it can definitely be a teen social network at times. If you do not want your child to read hormone induced teen love chat (at times it seems that way and they even find a way to cuss using allowable words).  Of course there are tons of words that even with no Parental Controls are still filtered. I had been asked my age by some other teens (if they really are) so they find their way to use allowable words to tell ages. Like tree team for 13.  You get it.  That would be the only thing if you had little ones who like online gaming, definitely use parental control. There are alot of kids on there with it so they shurley wont feel singled out. 

Other than that I absolutely LOVE this game. The choices in your wizard from how you want them to look to what “school” you want to attend it very cool.  It is definitely like walking into a Harry Potter type of life.  The graphics are cool and not cheesy at all. If you pay for a subscription you get to go into more areas to play, which I definitely would say fork out the cash for this, it is worth it. Plus they run specials where it is like 6o bucks for a whole year. Believe me you will definitely want to play for a year at least. The game is addicting!

The stronger your wizard is the better cards you get in your deck to cast spells. They have shops to buy stuff with the rewards of gold coins you get for battles. So there is really just the cost of subscription. Your Wizard will get all the cool stuff they want just by earning the gold coins. That makes it nice that you don’t have to keep feeding the online addiction. But if you want you can buy what is called crowns. this is definitely not something you have to do. I have been playing for a few months now and still don’t really need or desire to, yet… The crowns are bought and can be used to buy better pets and a cool house for your  Wizard to live in and put some of the things that you win. I just put my stuff in the free dorm room that all Wizards get to own for them self.  Maybe I will get a house, as I am getting a large collection of stuff. You definitely do not have to though. If you don’t even want to pay for a subscription about 9 bucks a month, 6 for family, you can just play for free and there is still alot to do!

 I would suggest however get each kid their own monthly subscription. That way if you have a couple of computers at home then your kids can play together online or you can play with your child, that is what I do. We have alot of fun and I think it has helped her reading also, that is a bonus there cause though she does not have the greatest reading capabilities (2nd grade) she can certainly get by and has learned what the words are and can do her parental controlled chat with ease now.  If you choose to share a subscription, you can make multiple characters on one 9 dollar account . You can make up to 6 characters and have them even in different “schools”  and be all completely different. Problem with sharing an account either the 9 dollar or 6 dollar family account is that the characters will not play all at the same time. So just splurge and get everyone their own. Less fighting for computer time also that way. 

The battles you do are not scary or bloody it is very fun without all that! It is like a “G – Rated” in any area for sure.  So no worries of actual violence! It is not scary for younger ones but it is still very cool for the older teens and parents! I like fighting the Kraken myself.  They have fairies, ghosts, skeletons, snowmen, ogres who fart (my daughter loved that), Cyclops, pumpkin headed creatures, bears, ninja pigs and mummy crocodiles just to name a few.   This is a great game and good for bribery at my house! LOL….

Momma says Clean that room and I will let you play for 30 minutes on Wizard 101!

Recipe: Rice Crispy Sushi treat – School time fun treat!

My daughter wanted something special for her class on her birthday. I was tired of the same ol thing and so was she. The cupcake.  Not to dis this cute little confection but everyone brings cupcakes. So on a budget that we are and we don’t want to invite the whole class over for a party, we try to make her birthday snack at school special.

This year since my daughter is into karate we wanted something Asian and fun. I remember reading something about a rice crispy sushi a very long time ago. So where this recipe originated I have no clue, I don’t have that recipe so I decided to make one up my self. I did not want to go through the trouble of making the rice crisp and marshmallow mess so I opted to buy the crispy treat made by Kellogg’s in the individual wrapped packages. Not only to save time and less mess but because if you ever had a premade one they are perfectly soft for shaping and some schools only allow you to bring snacks that are STORE BOUGHT due to allergies. So this perfectly follows the schools rules but allows your child to have bragging rights on how ”Mommy made it special for my birthday”. You can then still be the BEST MOM EVER!  You will also need to purchase green color fruit roll ups.  I bought some from Target, they have their own brand. The flavor is tropical and it is made with fruit juice and the color pattern perfectly imitated the look of the Nori (seaweed).  I also purchased some fruit juice less sugar fruit snacks for the center of the “sushi”.

In total her class has 16 students so I wanted each child to have 4 sushi on a plate. Each plate would have one sushi of each color of the fruit snack so no fights would break out over a certain flavor!  So in total I used 30 packages of crispy treats (2 boxes), 13 fruit roll ups and only 7 packages of fruit snacks.  So this investment was not a lot and you will have some extra packages of fruit snacks for future lunch boxes.  I used the flower shaped mini cookie cutter made by Pampered Chef. 

Out of each rice crispy treat I cut out two flowers with the mini cutter lightly sprayed with Pam to make cutting easier.  I then took a knife cut into center of flower used my fingers to make a little hole and inserted a fruit snack. I guess you could use gummy worms cutting them thin and stacking different colours to make it look more like a California roll or something, I just choose to go simple one color in the center. Manipulate the crispy to hold fruit snack nice in center.  Now take a green fruit roll up and wrap around the “sushi” leaving the paper on the one side (this will help prevent them from sticking to each other) cut with kitchen shears a little longer than size of roll when you are done wrapping and overlap the end over the beginning.  Now you have the cutest little sushi that every kid would love to eat! 

I had to make 64, don’t think this was a hard job to do. It was a breeze. If you cut up all the crispy treats first it goes surprisingly quick. Plus all the yummy left over from when you made the cut outs can be put together for extra sushi for the teachers or your hungry hubby who keeps coming in the kitchen wanting to eat some of the treats you are making for the class and not him.  Plus you can make this gluten free very easily by reading labels. I found some fruit jellies made by Sunkist that are gluten free! 

When I brought it into class I also provided chopsticks and the little chopstick helper thanks to the nice manager at Noodles restaurant he gladly gave me enough for the whole class.  The kids loved using the chopsticks with the helper. It made them like a big tweezers and all the kids (7 and 8 yr old) easily were able to pick up the sushi with the chopsticks.  The giggles and smiles were all I needed to know it was a hit. Practically all the students came up to me (and my daughter) telling me how cool it was and thanks for making them. Two even said can they take one of the extras home to their parents, others wanted to save one for a sibling. The end result was a thumbs up from my daughter and a big smiles from her and her class mates. Of course they all got to keep the chopsticks and holder so that was the bonus treat to take home. Plus for the rest of the day she felt so cool because the kids would tell her how much they liked her birthday snack!

Momma Says You cannot buy happiness, but you can MAKE snack time happy!

Happy Apple Farm

Well it is that time of year when summer is coming to the end and fall is near. This is the time when I like to take a day trip and take the kids to Happy Apple Farm. I highly recommend taking your family to Happy Apple Farm. The farmer is great he takes you by tractor or hay ride to the orchard. What kid would not love that! He is great about telling you where what kind of apple tree is and what is in season at the moment and where to find what is left of a over picked fruit. We wanted some pears and he told us were exactly to get what was left on the trees. He gladly tells you to go out and taste all the different varieties that they offer so you know what you like. He also tells what is good for cooking with.

The also have pumpkins and a berry field. I dream of one day going and picking gooseberries. Why, because I have never eaten one and I allways get there when they are all over with.  I have in the past gotten to pick rassberries and blackberries, which I made into some yummy home made jam! YUM! 

 We go to obviously to pick apples off the trees. There is something special about picking your own fruit right from the source. The kids will love it!  I never had my kid be more excited to eat an apple! This farm located in Peyton Co. It is a fantastic time for family to do something together. Even a too cool teen can still have fun and walk around the orchard and what? Still text while eating one of  life’s simplest of pleasures, picked fresh right there! The little ones can run up and down the orchard tasting all the different types of bounty each different tree offers. Plus you know since you can taste all of the different varieties of apples you know that the little ones will get their daily fruit intake.

If you do not live near Happy Apple Farm in Colorado you must google a orchard near your own town. You will enjoy a day of fresh open air, support your local farmer, get a bonding day and just plain enjoy a day on a farm.


Momma says; Go Country, visit your local farmer for fresh fun and YUM!

Review: Monster House

With Halloween around the corner thought we would bring out the movie Monster House though it  came out in 2006. This is still a good movie with some good kid time scary fun.

The story is about three kids, one of who lives across the street from that “one neighbor”. You know who he is, we all had one of those who did not like kids on their grass and were probably not the friendliest of neighbors so all the kids thought something scary went on there.  Well this movie delves into this with the scary neighbor who lives across the street from a boy named DJ.  DJ’s parents go out of town for business just before Halloween leaving DJ his friend Chowder with the babysitter Elizabeth aka “Z”. 

When Chowder accidentally got his ball on the lawn of Nebbercracker and they try to retrieve it, trouble starts with the old man and the house.  They befriend a prep school girl named  Jenny in the process and the three of them investigate to get to the bottom of the scary house and prove that something weird is going on there.

The movie is funny, some dark and scary elements probably not the kind of film for anyone under 7  for that reason and some crude words. It was scary enough to make my daughter say “that house is freaky and bizarre”. It has some touching moments of friendship and how you should not  judge a book by its cover kind of stuff.

I don’t like the fact that when the baby sitter is having her boyfriend Bones over,  it shows the boyfriend finishing a bottle that looks very much like a beer bottle at least to  to grown up eyes, kids might pass it up without a notice. When I asked my daughter “I didn’t see what Bones threw on the grass what was it?”  She said “oh that was a bottle of beer”, with a scowl look on her face.  Also not seen but heard is she puts off  his advances, it is not blatant but it is there. Then she kicks him out he calls her a “prude”.   To tell you the truth I hate when movies do this,  they add content that is not necessary for a “kid movie”.  I figure this is probably one reason it is rated PG.  Seriously though what kid would not want to see this movie it is very much advertised to get their appeal?  So just why go there?  We already know Bones is a dirtball type of guy.

YouTube Preview Image

In all I like this animated movie. My daughter liked it and it is perfect for a pre Halloween fun family movie night or any night.

Momma says get the popcorn and call the kids this is a good one.

Salt Dough fun family time

My daughter loves dough. She even gets a little from the corner pizza place to play with when we dine in the restaurant. So she was very excited to make this craft at home. Think of all the orniments you and your kids can make for Christmas. It would be a cool thing to see over the years all the ornaments as your little ones grows up. Plus no worries that they will eat it and get sick like some cheap imported brands sold in the stores.  Then make your own.  No cooking necessary, so that is always a plus. Make salt dough, if they put it in their mouth it will be to salty and they wont want to do it again. 

Recipe is:

1 cup flour

1 cup salt (fine grain is best)

1/2 cup water (little more if needed)

food color optional

* heard you can add vanilla to inhibit mold growth (if kept in plastic baggie for future rainy days) and to make it smell nice.

Put all the ingredients in a large zip lock type plastic baggie, I put the water in slowly, little at a time until right mixture forms. Have the kiddos mix away.  Squishing the bag is half the fun watching the dough form.  The baggie helps with the mess if you dont like getting your hands sticky and dirty until dough forms (know some kids who are like this).

You can let the creations air dry or bake at a low temp. like 200 until hardened.

Your little one can paint the harden dough sculptures with acrylic paints if you did not previously dye the dough or leave natural for pretty look also.

Momma says sit and craft with the kiddos, the darn dishes can wait..